Adding an Event
Create an event and add its why, who, when, and where details.
Events in Board Director are similar to meetings. The difference is that events don't have agendas. Here's how to create one:
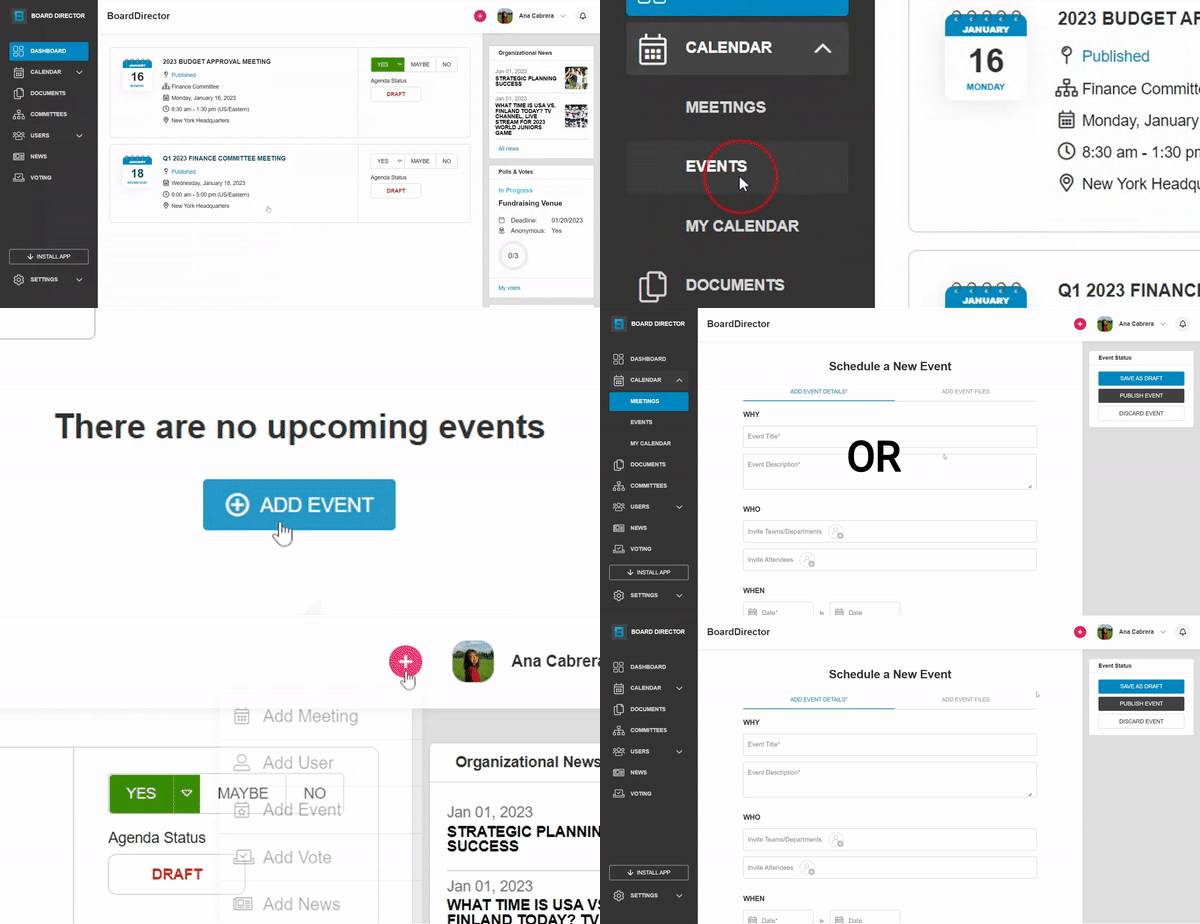
- Go to CALENDAR > EVENTS, then click the + ADD EVENT button. You can also click the + button from the header, then select Add Event from the drop-down options.
Note: The ADD EVENT FILES tab can only be accessed once the event has been saved or published.
- Fill out the why, who, when, and where details of the event. Fields with an asterisk * are required.
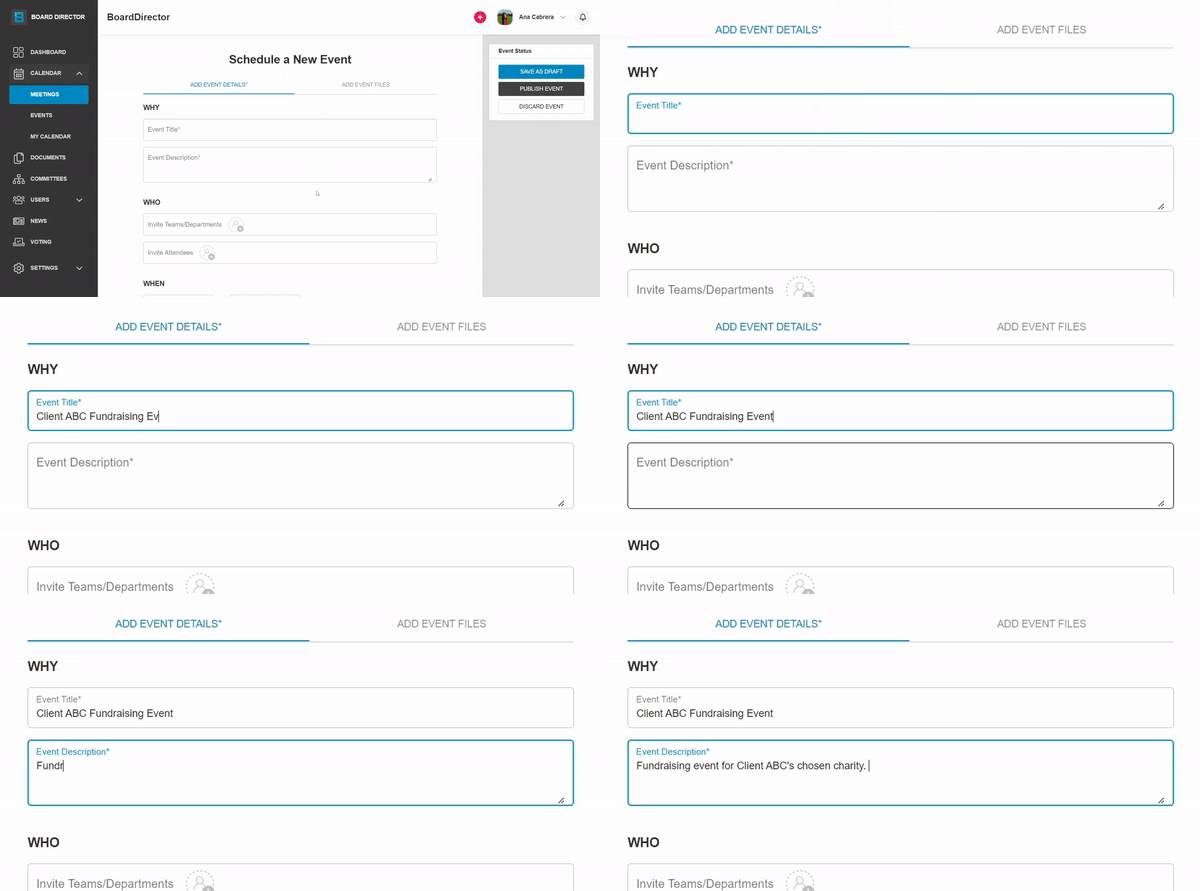
- WHY - type the Event Title and Event Description in their respective textboxes
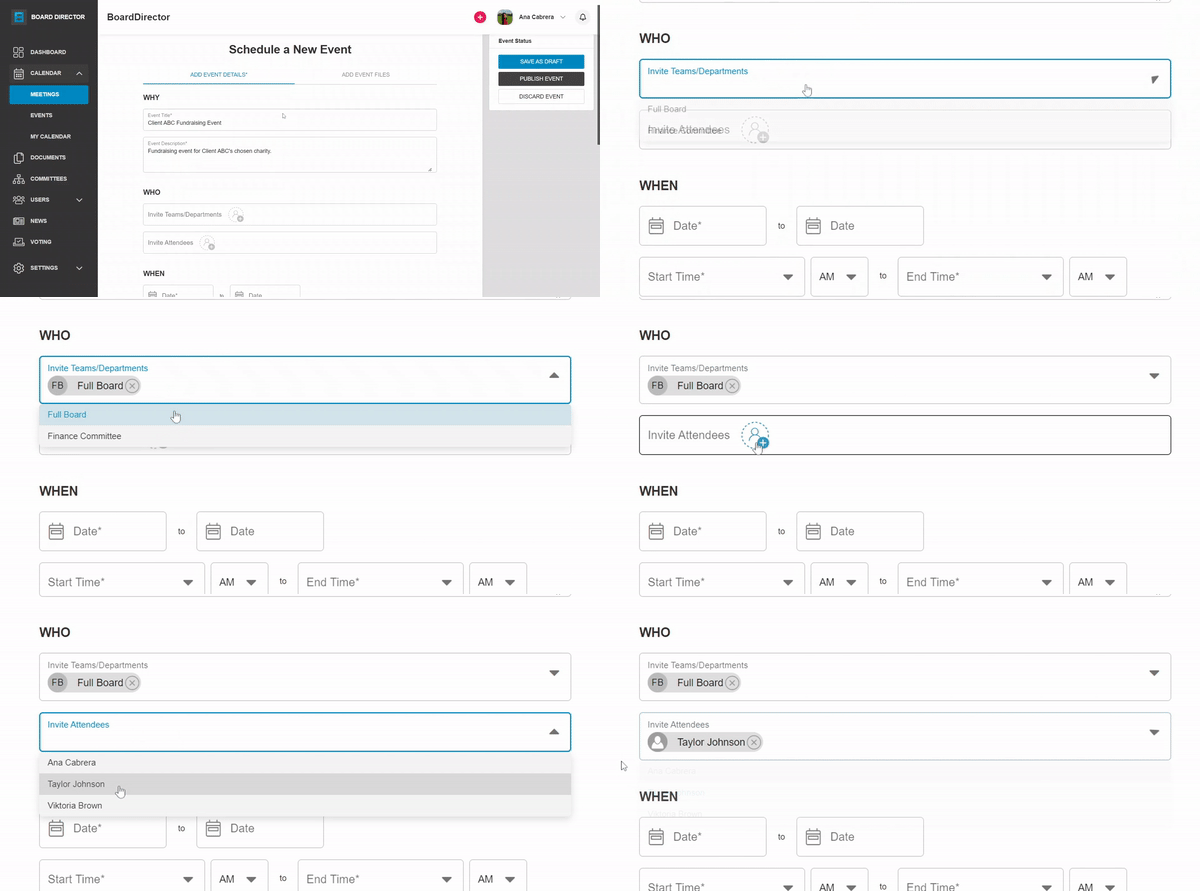
- WHO - add people and teams/departments who are invited to the event by clicking the drop-down fields and selecting from the options
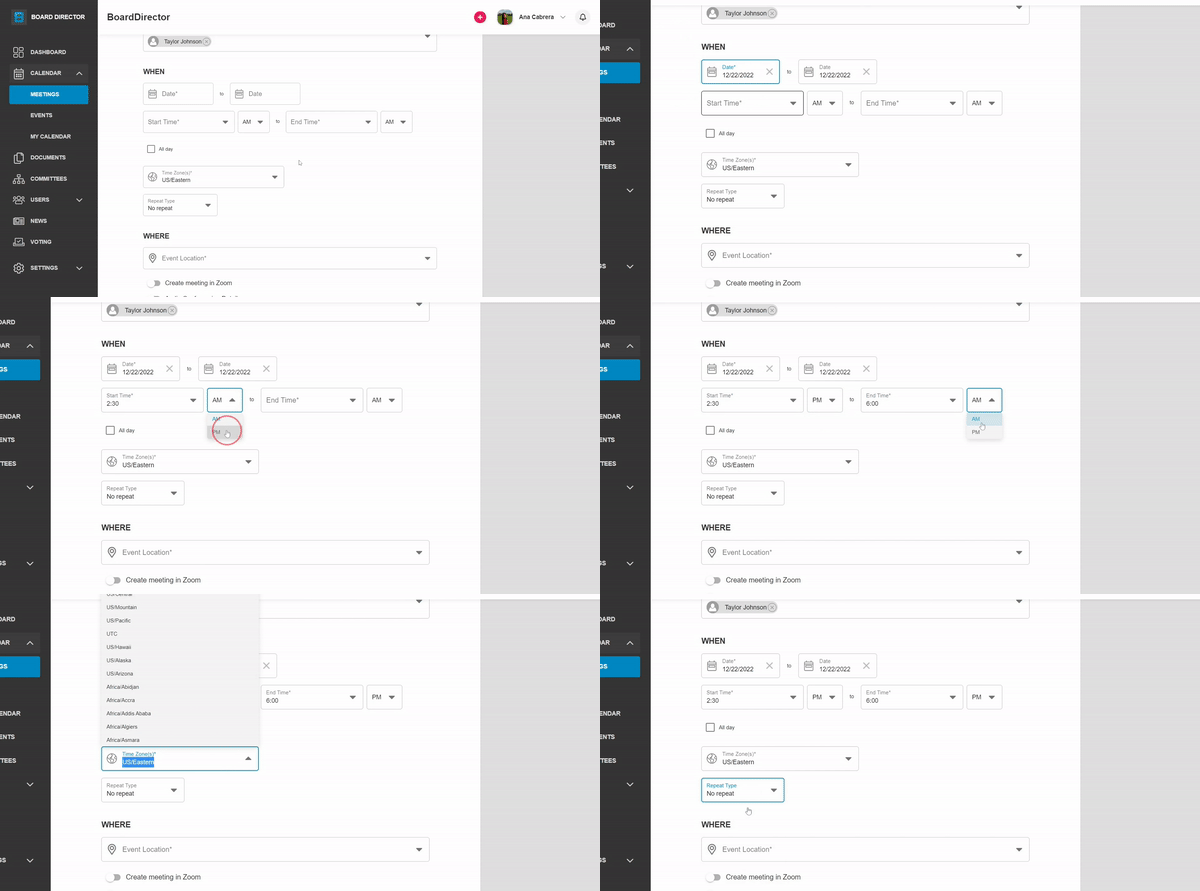
- WHEN - select the date and time of the event. Also, choose the correct time zone and indicate if the event is recurring. If the latter is true, select the frequency from the drop-down options.
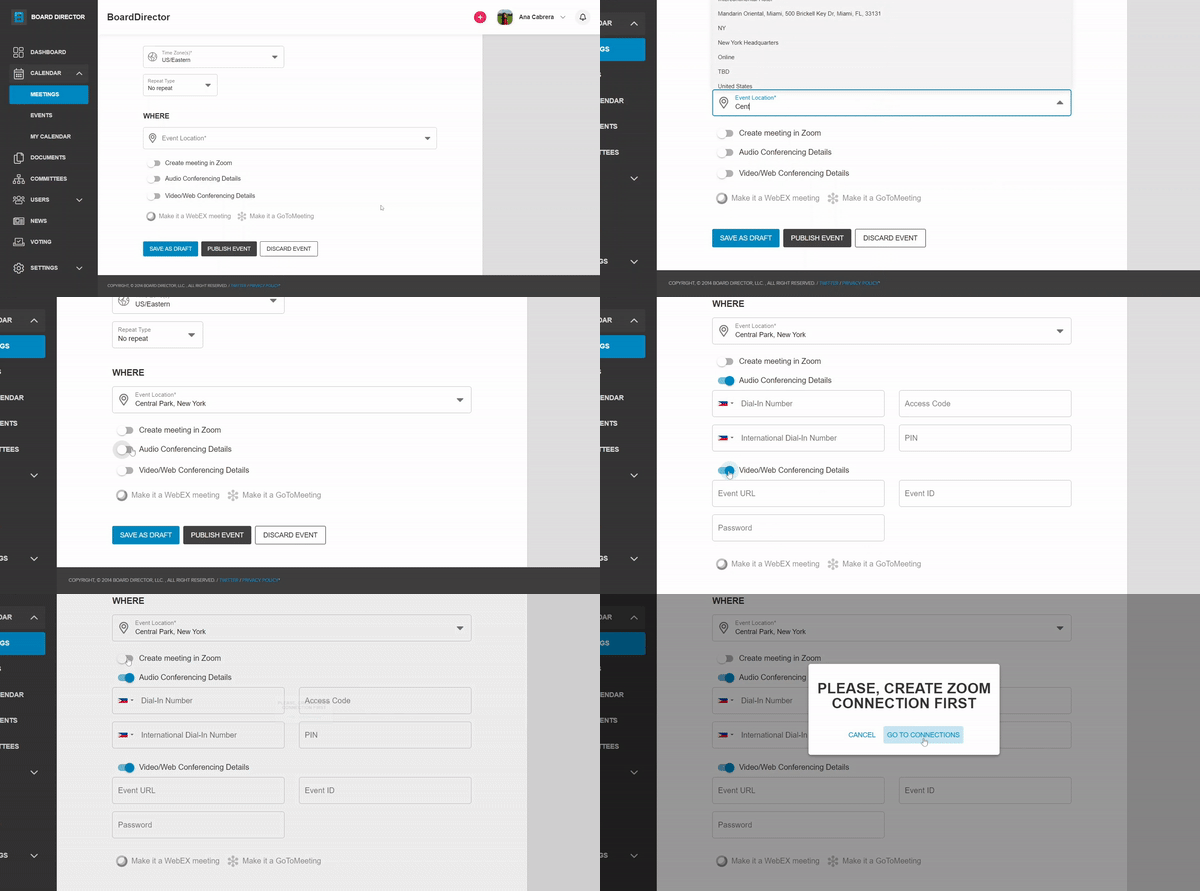
- WHERE - insert the event location in the textbox. Optionally, you can turn on the toggle buttons for Audio Conferencing Details and Video/Web Conferencing Details so attendees who can't come in person can dial in. A Zoom meeting can also be created directly from Board Director but it has to be set up first in My profile > CONNECTIONS.
- WHY - type the Event Title and Event Description in their respective textboxes
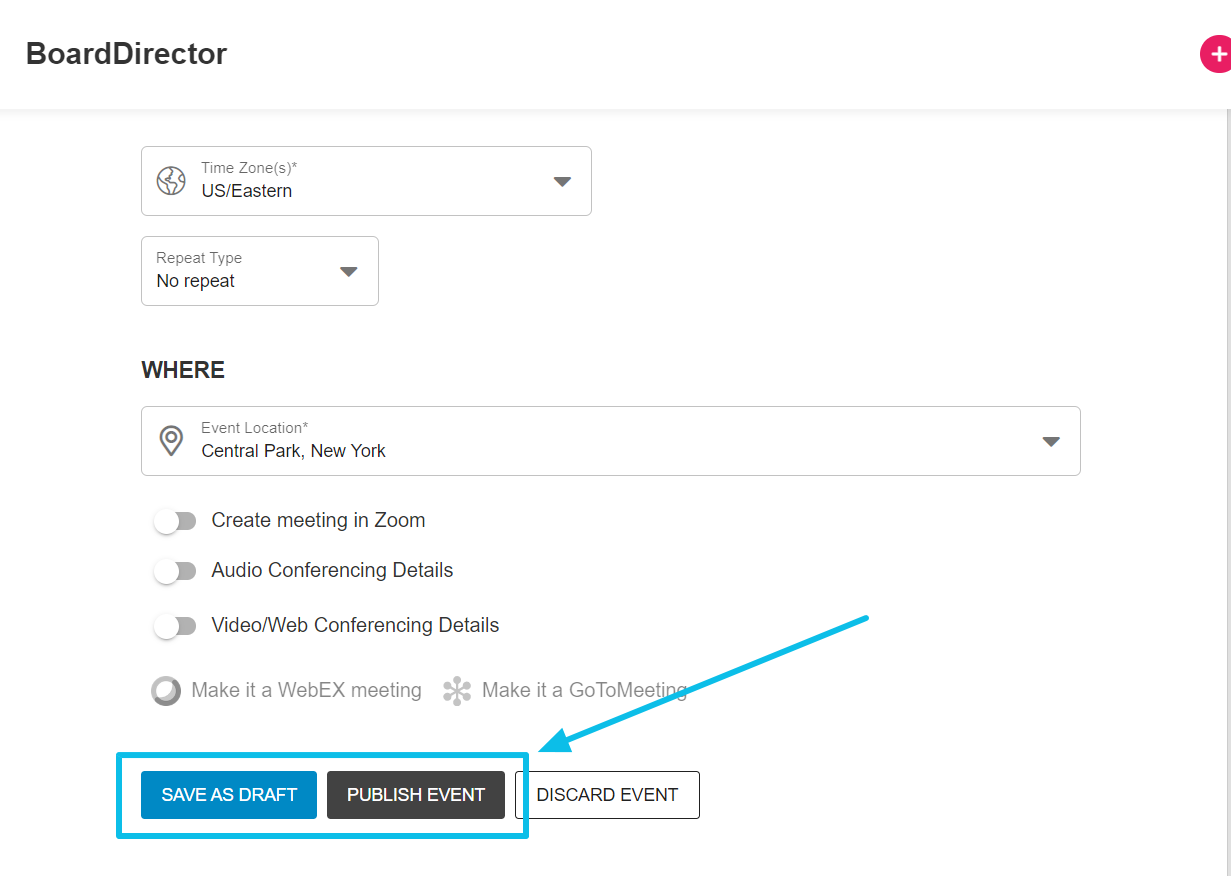
- Once these details have been added in, you can either:
- SAVE AS DRAFT so the event will not be sent to the invitees yet. Only the one who created the event and admins can view drafts.
- PUBLISH EVENT to make the event public and add it to the invitees calendars.
Once the event is published, user can view the details of the event under Events > Upcoming Events.
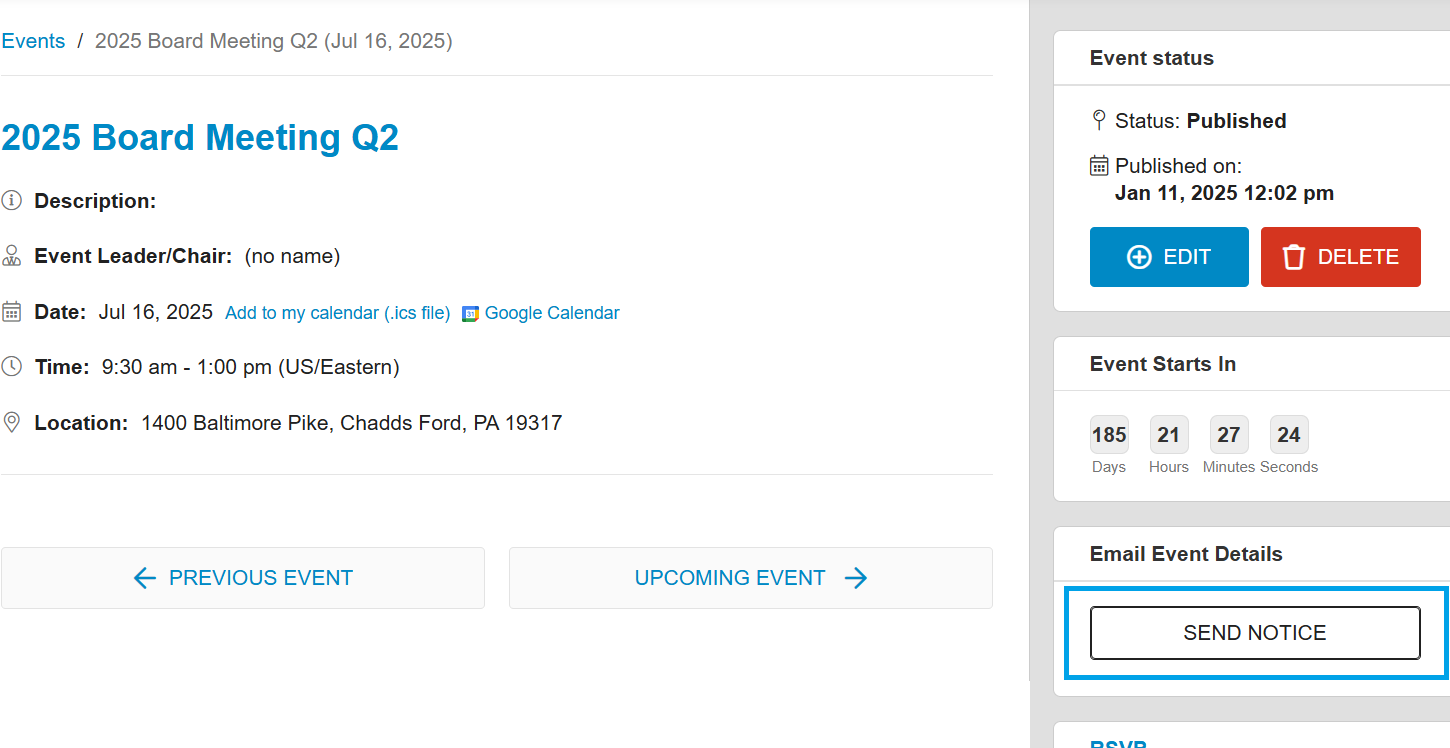
Note: On publish of Event, no notification is sent to Attendees. To send notification, you can click on 'Send Notice'. Once first notice is sent, button will change to 'Send Reminder'.
