Protected Folders
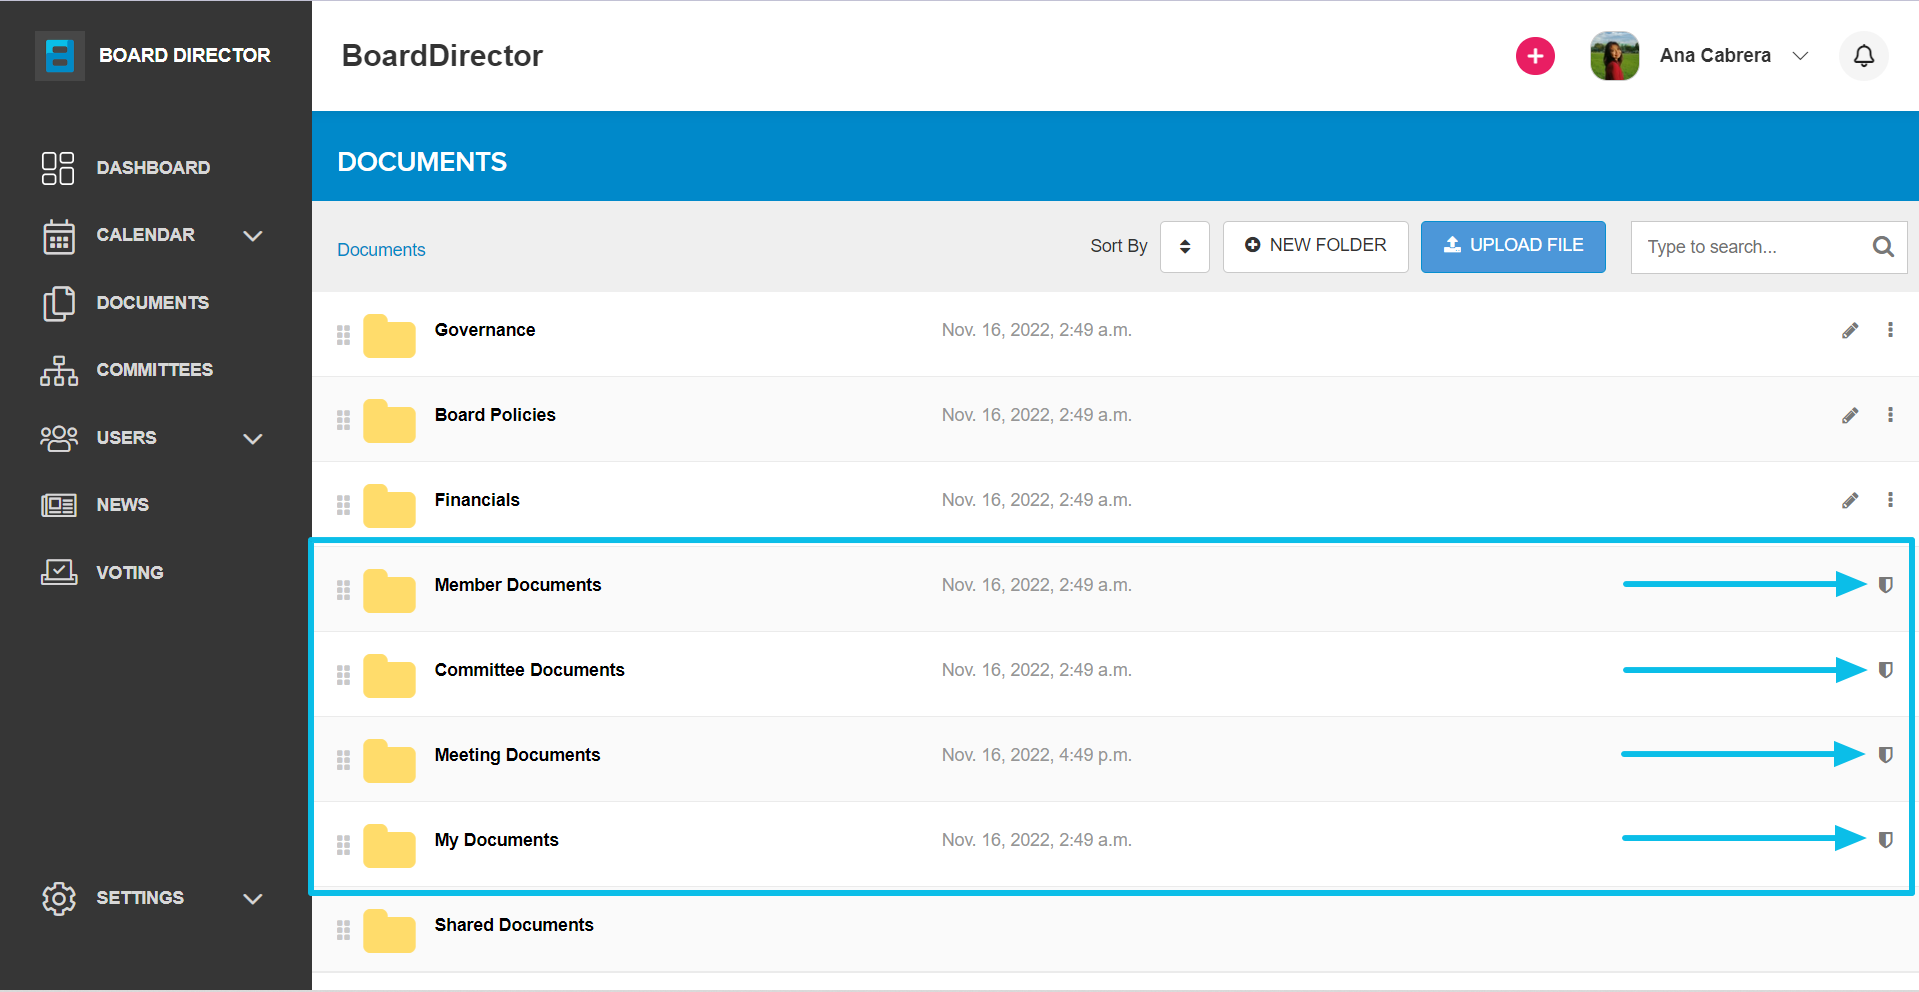
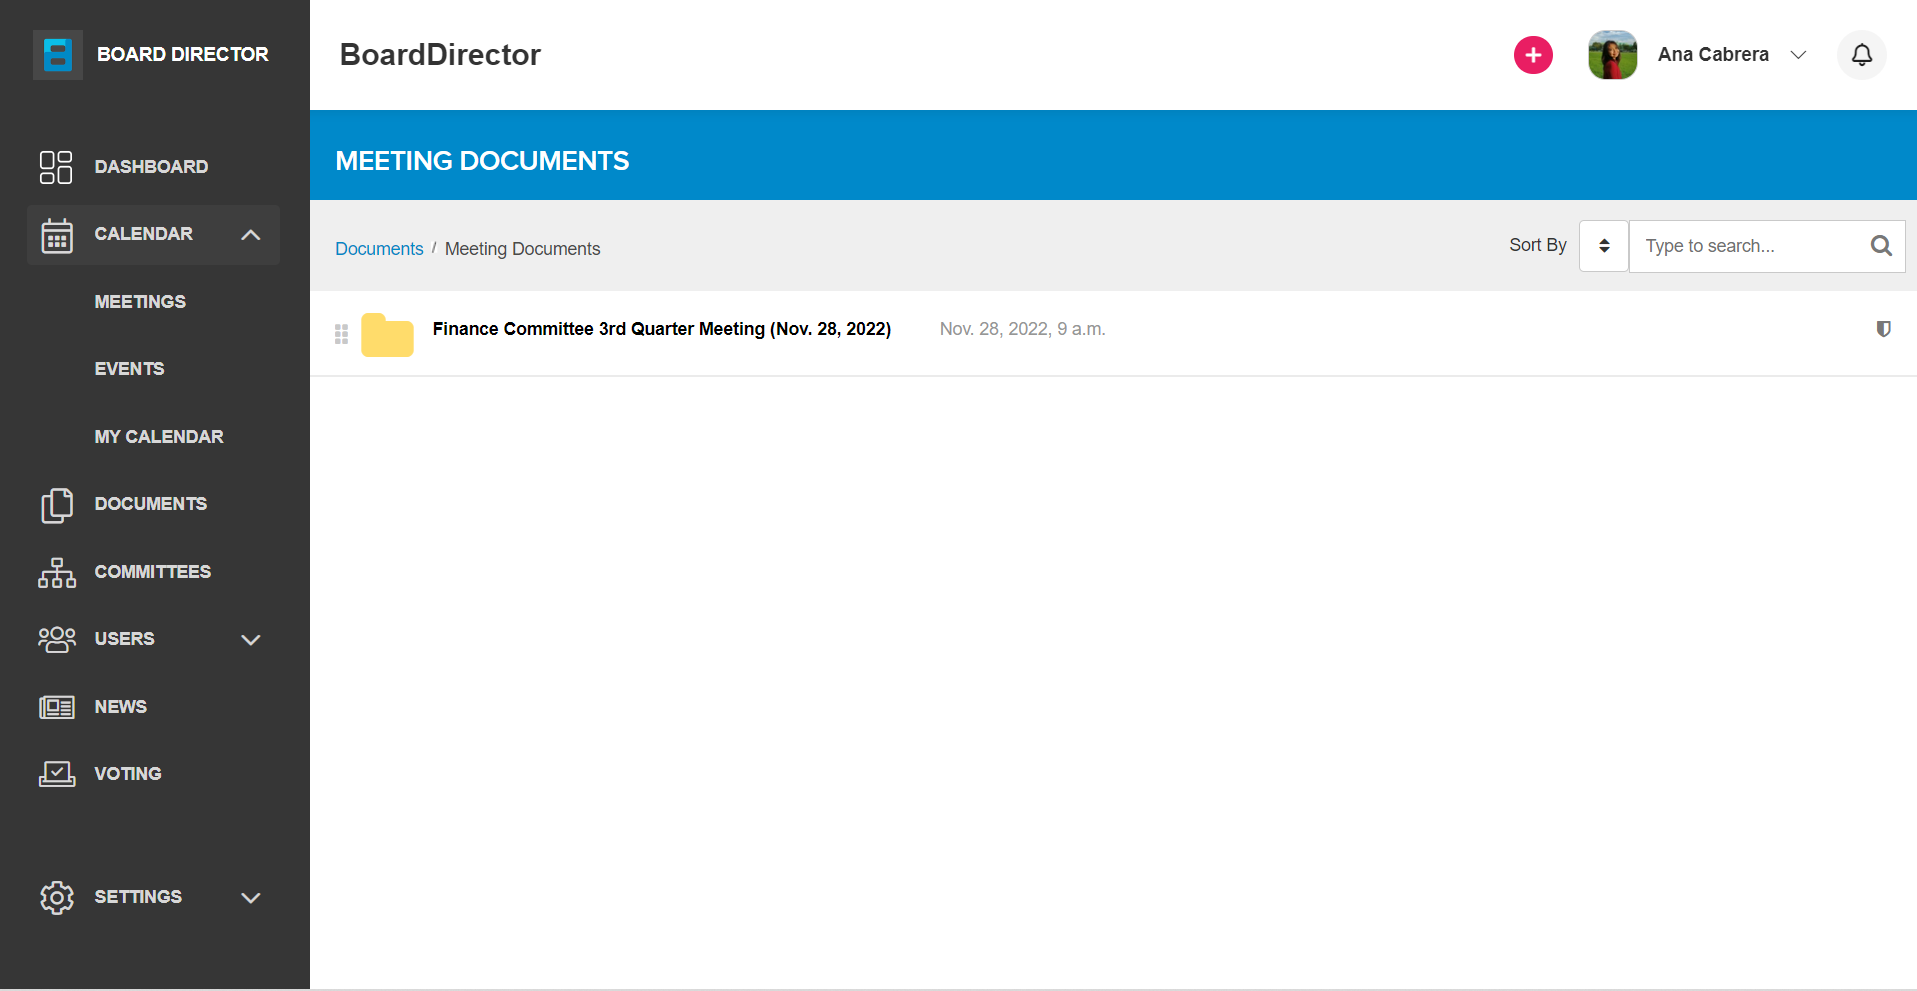
There are four protected folders in the DOCUMENTS tab by default. These are denoted by a shield icon on the right side of the folder name, instead of the three vertical dots and pencil icon. Any folder with the shield icon can't be edited or deleted.
Member Documents
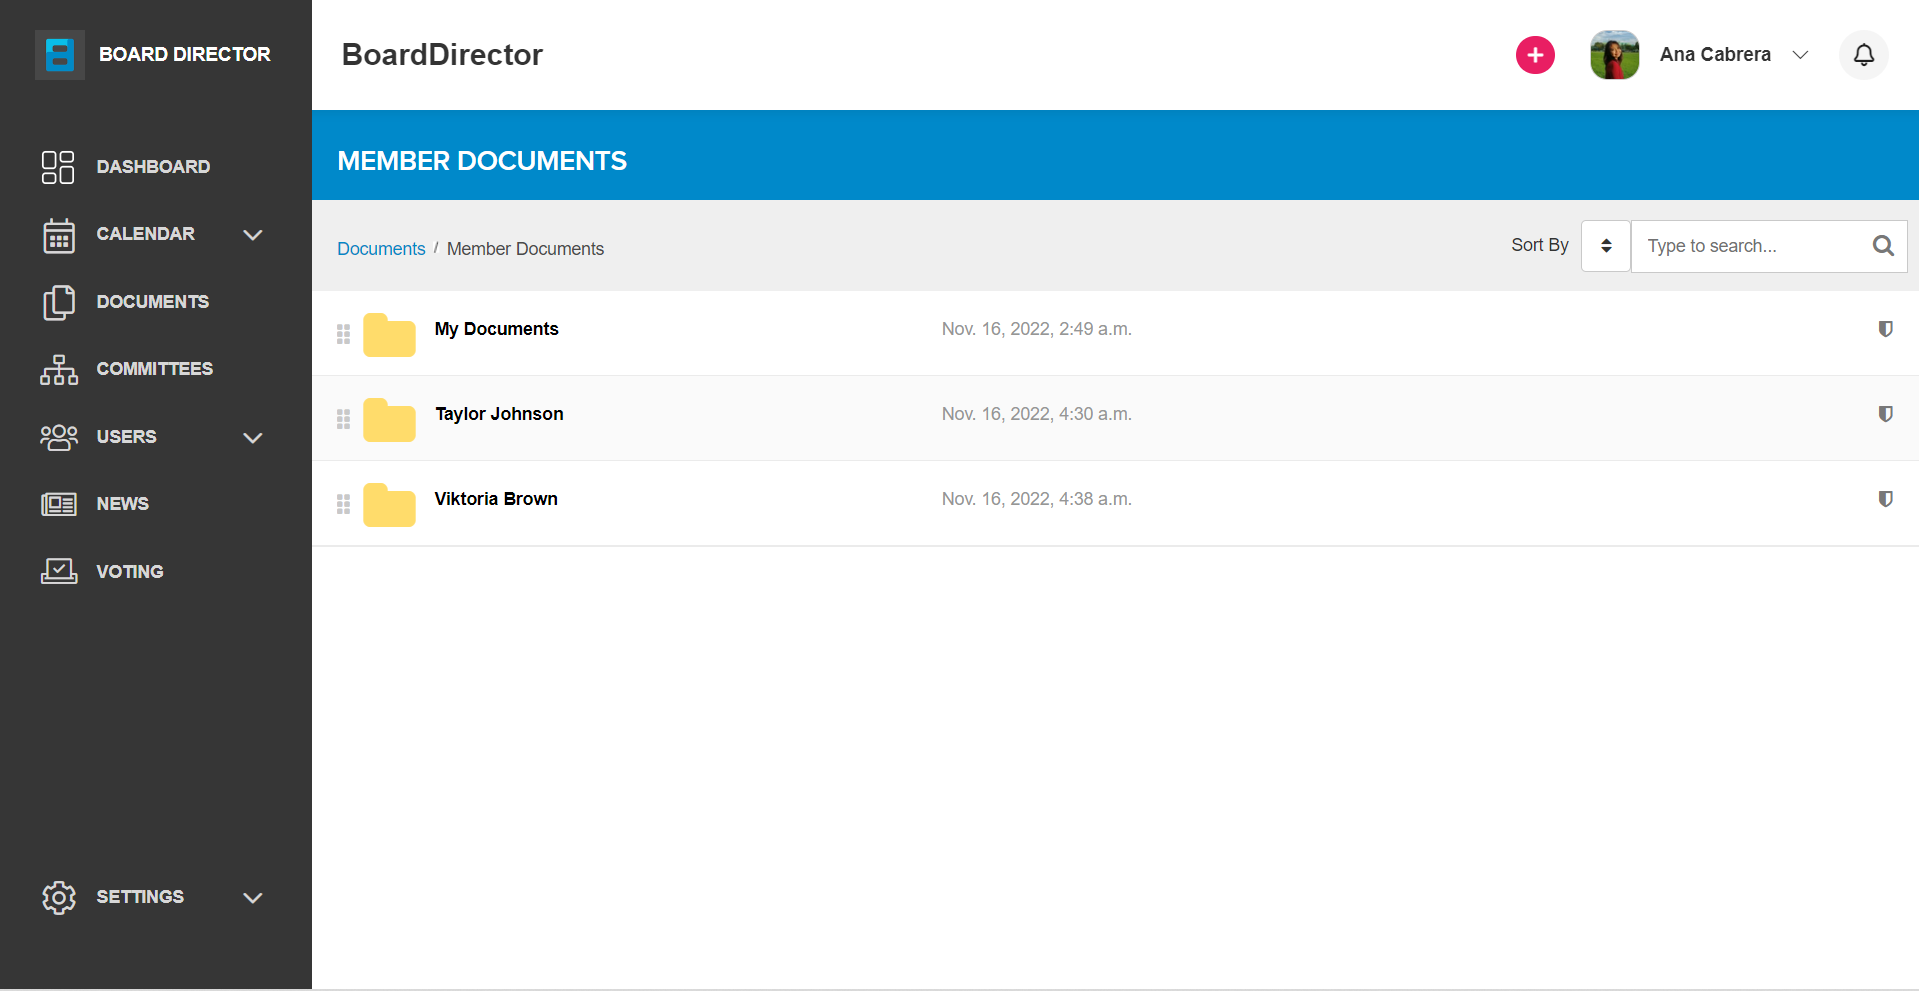
This folder is only accessible to admin users. It contains the individual users' files compiled in separate folders named after them. The admin user's own My Documents folder can also be accessed from this folder.
Uploading documents in this folder is similar to the process shown in our Uploading Documents guide, while the process for creating a folder is shown in our Creating a Folder guide.
Committee Documents
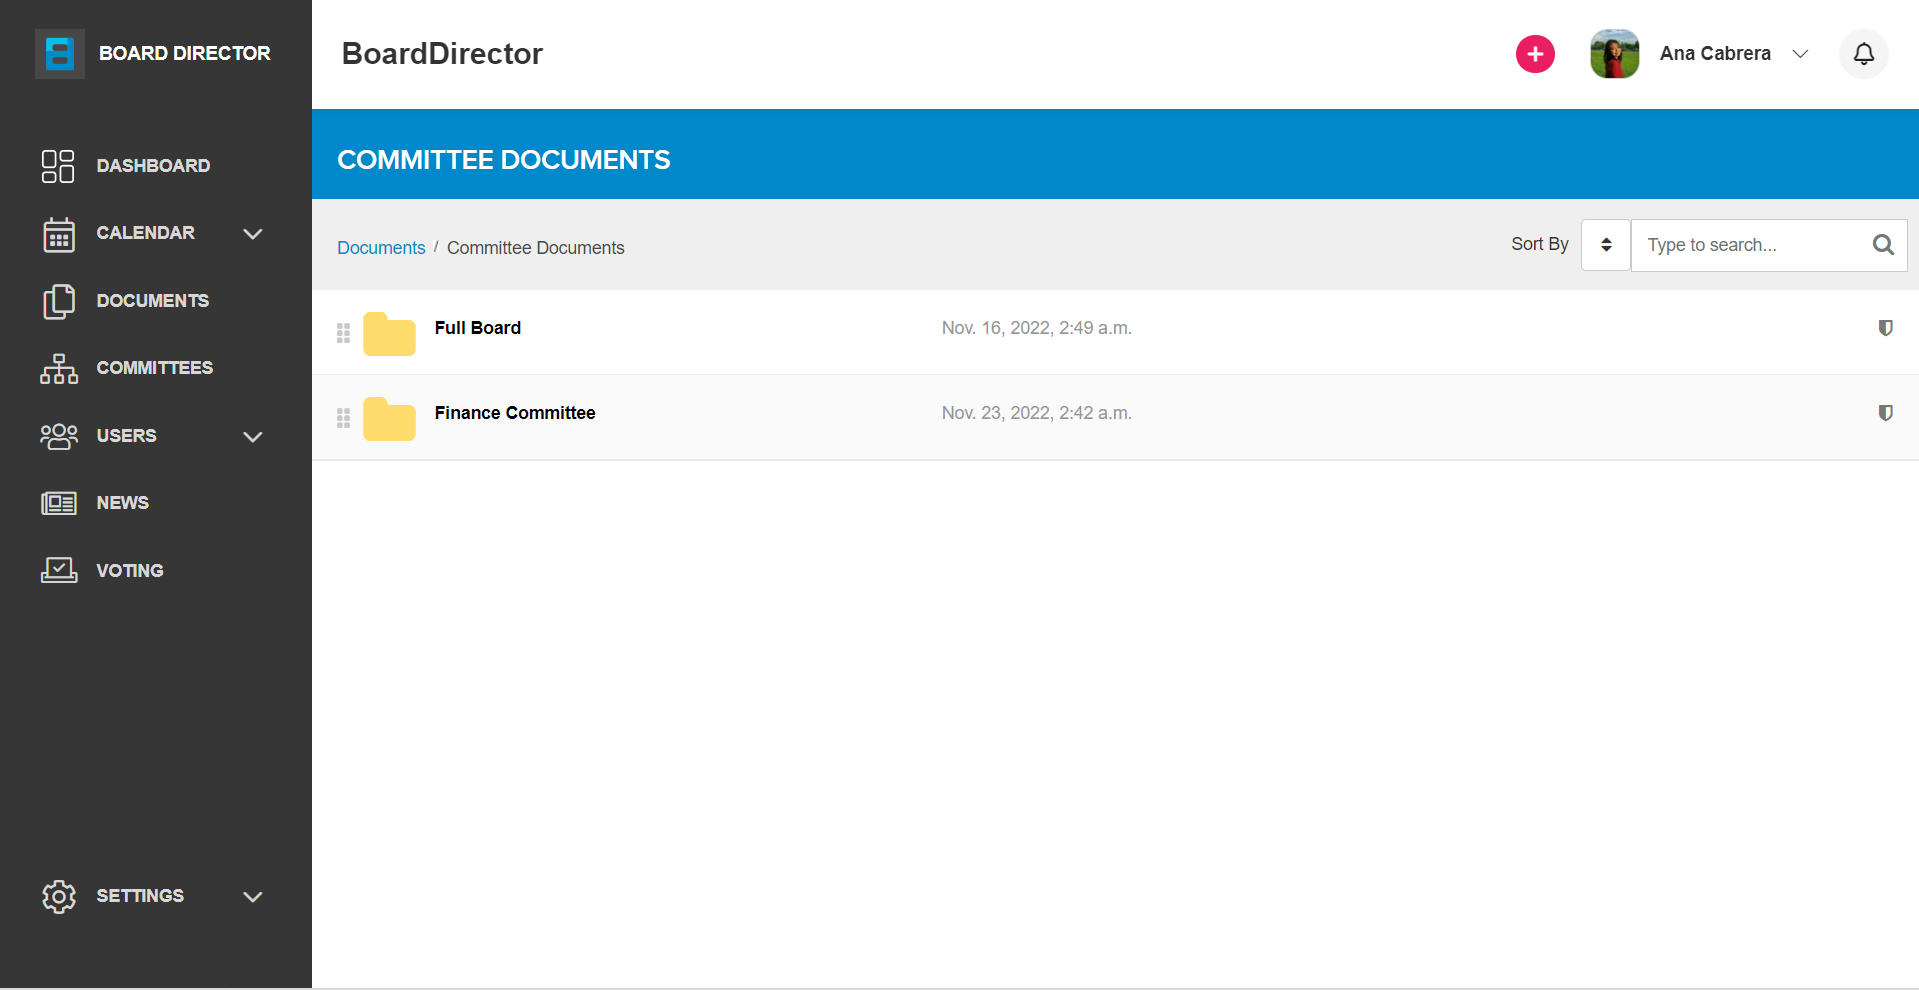
Documents of different committees can be found here. All board members have a Committee Documents folder. Non-admin users can only access the folders of the committees that they are members of. On the other hand, admin users have access to all committee folders.
There are two ways to upload files in this folder:
- Within the DOCUMENTS tab: Go to DOCUMENTS > Committee Documents > Select committee folder. Then, upload as shown in our Uploading Documents guide.
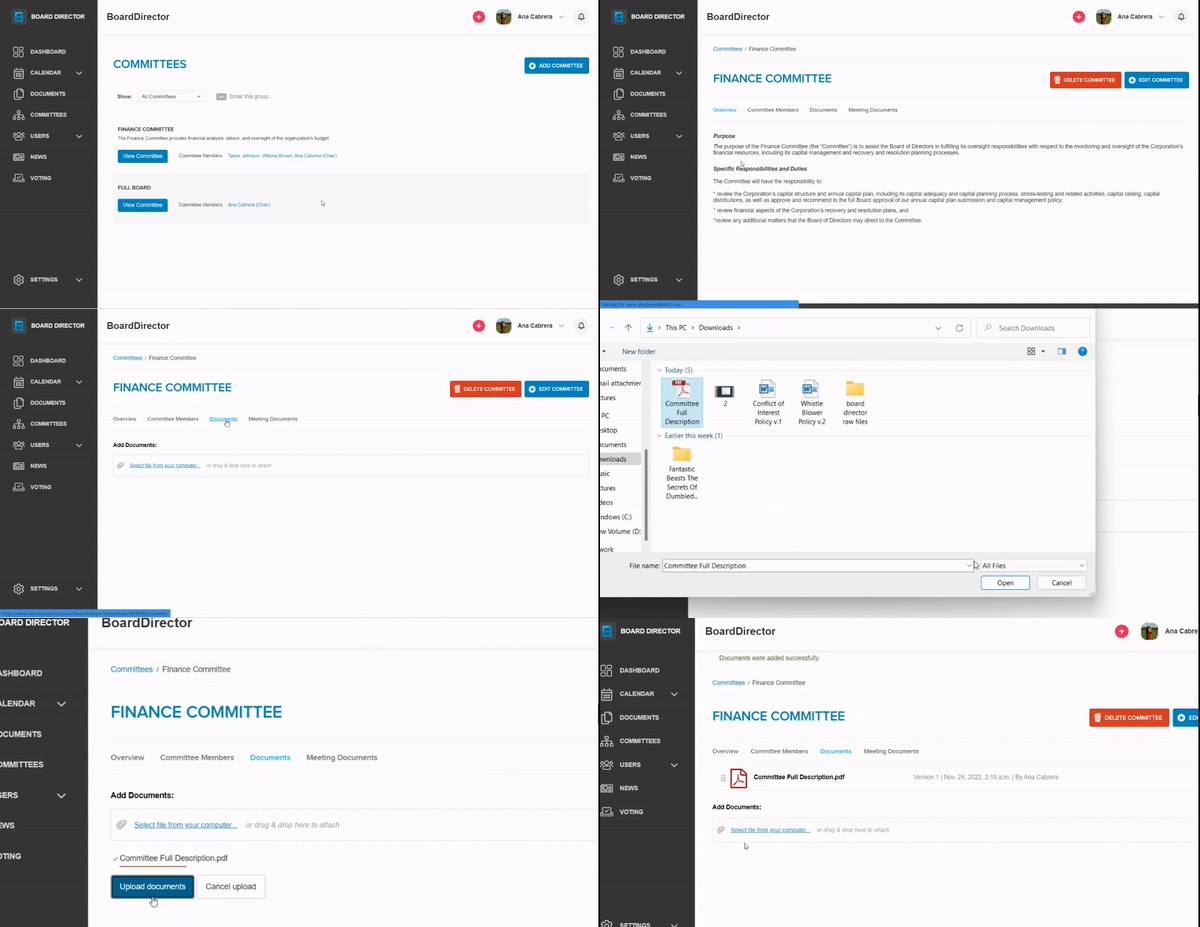
- Within the COMMITTEES tab:
- Click the View Committee button associated with the committee you want to upload documents for.
- Click Documents from the menu at the top.
- Select file from your computer or drag & drop files to upload them.
- Click the Upload documents button.
Unlike documents uploaded in other locations, all uploaded documents in committee folders will be instantly available to committee members. There's no need for an admin to give users the permission to access them. However, they will need an admin user's permission to download them. Download permissions can be given by following our Document Access and Permissions guide.
Meeting Documents
This folder contains meeting-related documents. Each folder is named after the meeting title, followed by the meeting date inside parentheses. All board members have a Meeting Documents folder, but non-admin members only have access to documents for meetings they're invited to. Admin users have access to all meeting documents regardless if they're invited or not.
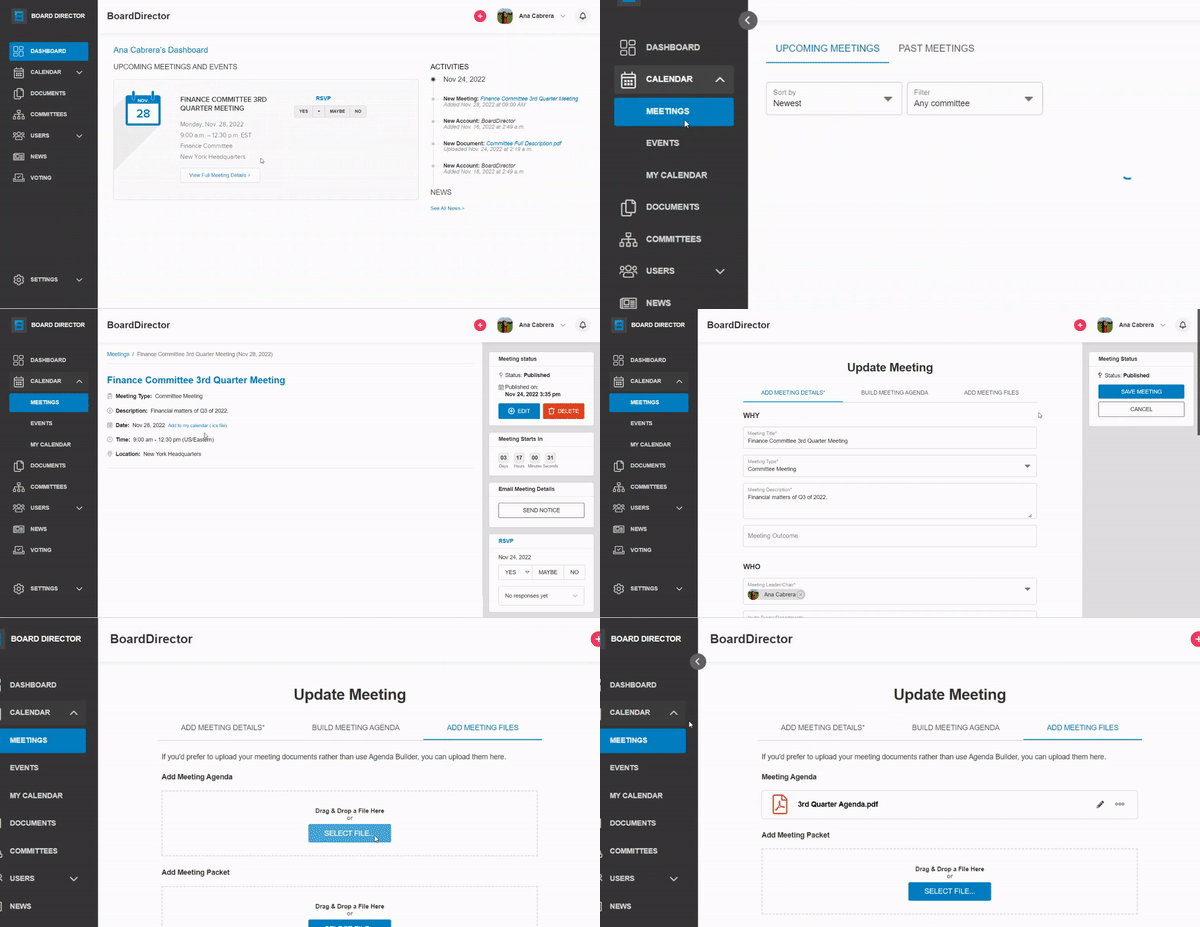
Meeting documents can be uploaded from the MEETINGS or DOCUMENTS tabs:
- From the DOCUMENTS tab: Open the Meeting Documents folder, then select the meeting. Upload as shown in our Uploading Documents guide.
- From MEETINGS:
- Go to CALENDAR > Meetings > Select meeting.
Note: Upcoming meetings can also be accessed from the Dashboard. - From the meeting controls on the right-hand side of the screen, click the + Edit button.
- Select the ADD MEETING FILES tab.
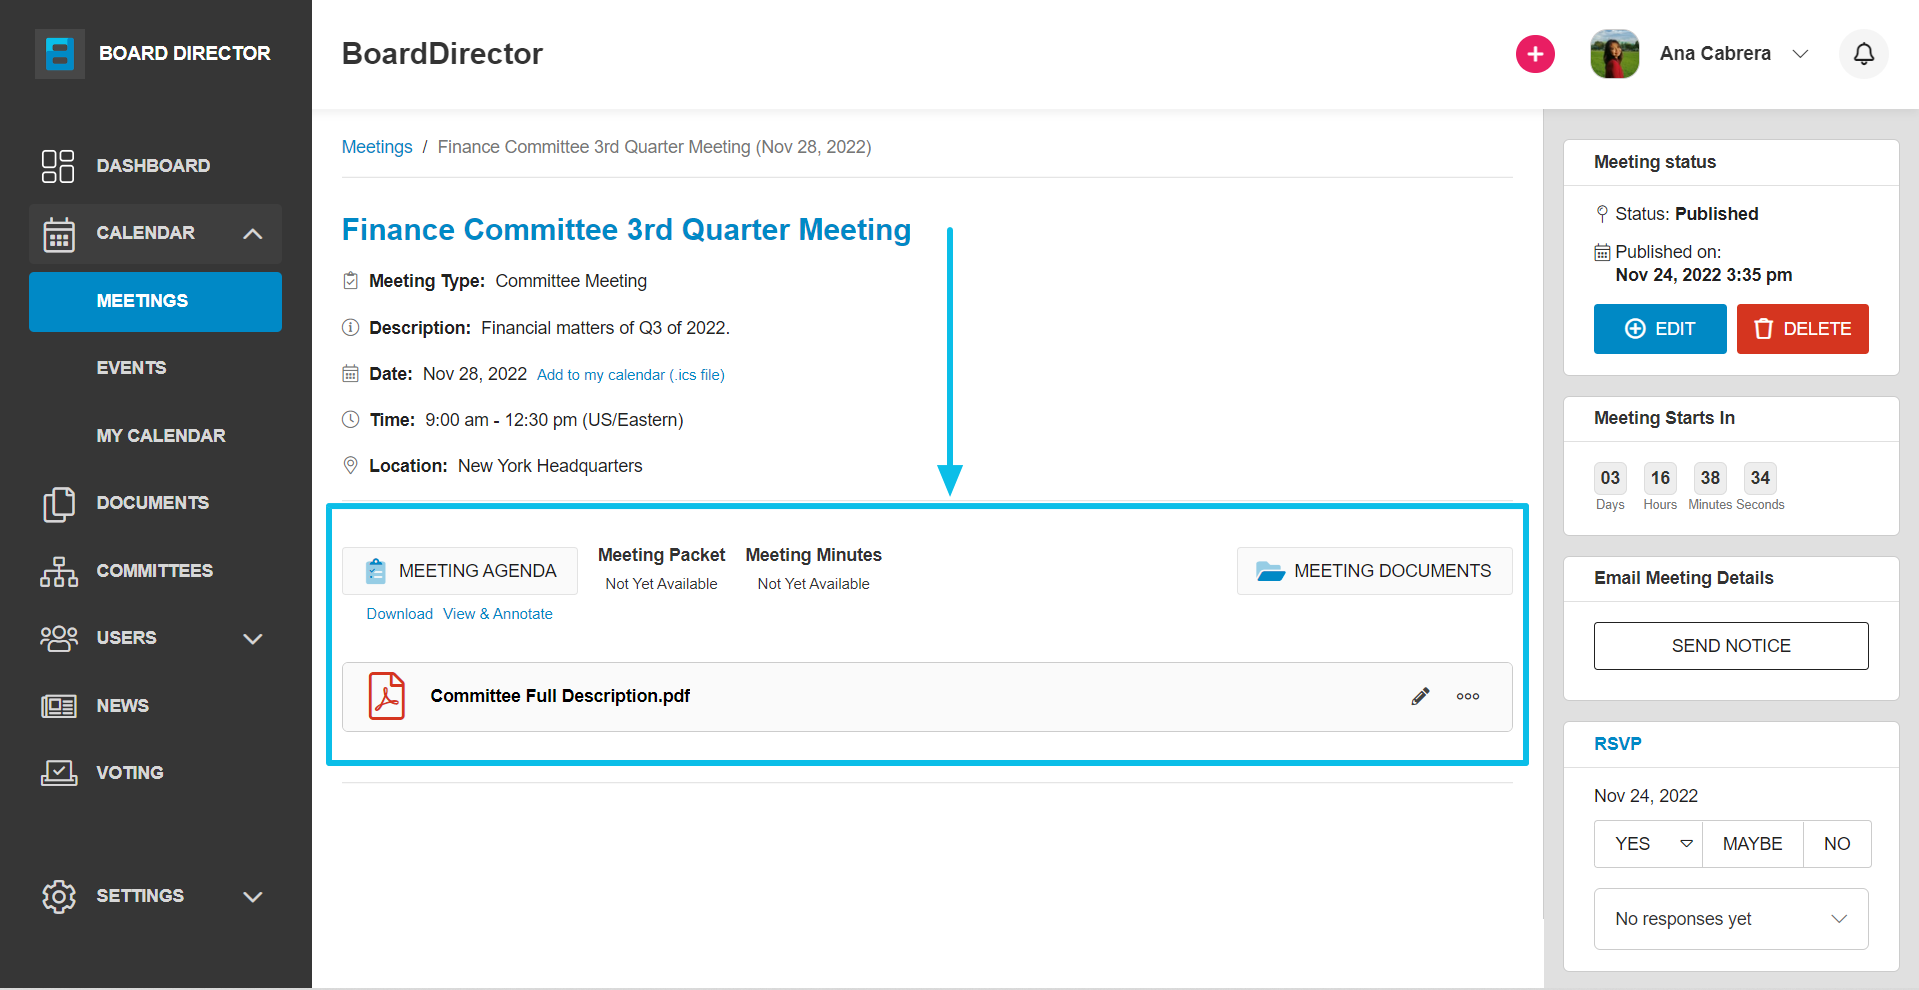
- Click the SELECT FILE button for the document type you want to upload. You can also drag & drop documents into the allotted space to upload them. Document types are Meeting Agenda, Meeting Packet, Meeting Minutes, and Meeting Documents.
- Go to CALENDAR > Meetings > Select meeting.
Uploaded documents will be accessible from the meeting details page. Documents will be labeled as their document type. Documents uploaded from the DOCUMENTS tab will be automatically classified as a meeting document and will have no label.
My Documents
All board members have their own My Documents folder. Non-admin users only have access to their own My Documents folder, while admin users can access all users' in the Members Documents folder.
Uploading documents in this folder is similar to the process shown in our Uploading Documents guide, while the process for creating a folder is shown in our Creating a Folder guide.

